
Into the Darkstone Tunnels
In which the Company experiences the first level of the Burning Lands

Bright Crescent Company is my up-coming solo TTRPG where you take on the role of a Commander leading their Company into the Burning Lands. While only the Commander has stats, each company member provides various benefits: advantage against certain types of enemies, healing, protection from damage, or easier navigation.
This will be a hybrid mechanics discussion and playthrough, where the bulk of the fiction will come from excerpts from the Company’s campaign log. I won’t display all the rolls, but I will discuss those that introduce new mechanics or otherwise result in interesting (or deadly) events.
NOTE: there will be mechanic changes exhibited in these posts as issues arise and require fixing.
“The portal into the Burning Lands was a whirling vortex of orange, yellow, and red. Were it not for Commander Griffid, I sincerely believe young Ryderch would have turned tail and ran. But such is the Commander’s innate charisma, even the terror-filled eyes of the pikeman settled at his speech. He was the first to step into the portal, leading the four of us with courage I couldn’t muster even after my decades of campaigning.”
— Excerpt from Morfel the Hammer’s campaign log
Bright Crescent Company is, at its core, a dice generated dungeon crawl. So, as the Company enters the portal into the Burning Lands, we have to roll up the chamber they find themselves in. The basic gameplay loop is:
Roll a chamber on 2d6
Roll number of exits on d6
Roll the contents of the chamber on 2d6
Resolve the content roll via combat or skill check
Chamber Shape/Size - 2d6: 9, corridor 20’
Exits - d6: 1 exit
Chamber Contents - 2d6: 7, a seemingly empty -> d6: 2, empty
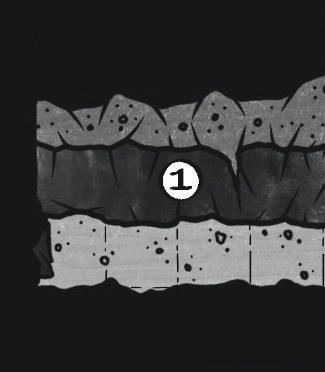
For the first chamber in hell, this was a fairly benign experience. As you can see by the Chamber Contents roll above, the seemingly empty chamber has a chance to actually have something in it and requires an extra d6 roll. Another important note: corridors always have one “exit” even if you were to roll a zero on the exit table since corridors logically have an outlet wherever the hall ends. You may choose to forego an exit roll in a corridor, or see if there’s more than one. In this case, I decided to only use the “logical” exit.
“The relative normalcy of the corridor we landed in was quickly displaced by the second chamber. Piles of flesh filled the small space. Some of it was fresh, with blood still seeping into the stone beneath our feet. A demon, its form concealed beneath a cloak of stitched together skins snarled as it raced to attack the Commander. He had little problem dispatching the foul thing with but two swift swings of his sword. The spectacle filled us with a mingled concoction of sheer terror and awe at Griffid’s composure in the face of such debauchery.”
- Excerpt from Morfel the Hammer’s campaign log
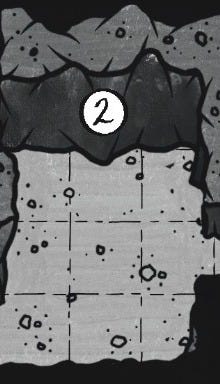
Each level of the Burning Lands (of which there are nine, plus the final boss room) has a theme. The first level is known as the Darkstone Tunnels. These tunnels are crudely bored Darkstone, a type of hell-stone that absorbs light. The denizens of the Darkstone Tunnels are all comfortable in dim light environments.
Once we pass the first chamber in a level, we can begin rolling to see if we find the stairs down to the next level. This is a simple d6 roll, with a one indicating the stairs have been found. The Cartographer unit, one of eleven different options for filling out your Company, increases this chance to 2-in-6. I rolled a 4, so no stairs.
Chamber Shape/Size - 2d6: 4, square 15’
Exits - d6: 2, one
Chamber Contents - 2d6: 8, piles of flayed skin line the walls → Flayer attacks.
Stairs - d6: 4, no
We also landed in our first combat of the game against a disgusting flesh-cloaked Flayer. This is a great time to give an overview of the combat system. Each enemy possesses a stat block displaying their Danger Rating (DR), Hit Protection (HP), and Armor (AR), as well as any attacks they have. Danger Rating is the number that you must beat on a roll of 2d6 + Strength in order to hit. On a hit, you roll your weapon’s damage dice, in this case my Commander is using his weapon with one hand and rolls a d6 for damage.
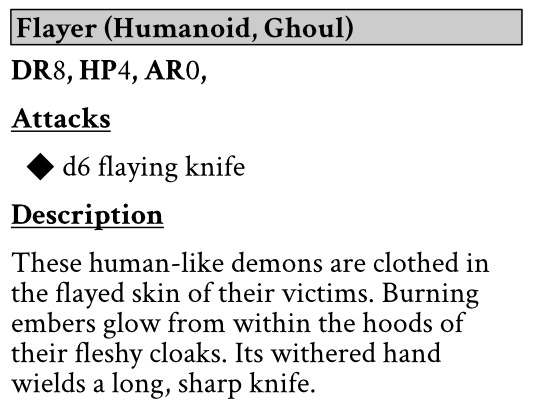
If you fail to roll equal to or higher than the enemy’s DR, you miss and roll the enemy’s damage dice. This is the only time enemies roll. You either hit and do damage, or you take a hit. It reduces combat from the four rolls of the original Oathbound combat loop to two. It also makes things a bit more survivable for a single character.
DESIGN NOTE: After playing through this level, I realized that combat was too easy. This prompted a return to Oathbound’s Attack and Defend rolls for combat. If you meet/exceed the enemy’s DR, you do damage. Otherwise you move into the Defend phase, where the enemy attacks. Here, roll 2d6 +STR (if blocking/parrying) or +DEX (if dodging). Meeting/exceeding the enemy’s DR means you take no damage. Otherwise, you roll the enemy’s damage dice and subtract the Commander’s AR to determine the damage taken.
In the case of this combat, I rolled a hit on the first attack round, doing a measly one damage, then double sixes on the second round. Double sixes on the dice results in a critical hit, doing the full damage of the weapon (in this game, that’s always 6) plus a roll of the dice. I did enough damage to take out a small army of Flayers with that hit. Flayers don’t give treasure, so we move on to the third chamber.
Attack: 2d6 + 3 STR vs DR8 = 10, hit → 1 damage
Attack: 2d6 + 3 STR vs 8 = 12 (crit) → 6 + d6 = 5 → 11 damage
“We never saw the oversized bat-thing that dove on the Commander within moments of entering its lair. The only warning we had was a high-pitched screech that threatened to put us all on the floor. The Commander, disoriented as he was, struggled to bring down the flapping, screeching bastard. My eyes may have deceived me, but I swear I saw Griff glow green as the creature sank its razor fangs into his shoulder. It seemed to be rejuvenated after that, but, fortunately for us, Griff struck it down with a lucky blow that sheared off a wing and allowed him to pierce it through the keel.”
— Excerpt from Morfel the Hammer’s campaign log
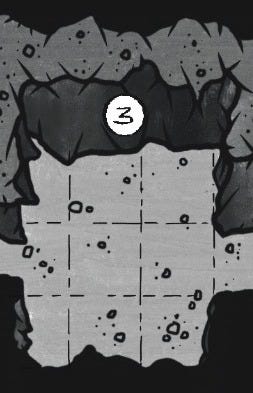
The third chamber presented the Company with their first Skill Check against a high-pitched screech. Skill Checks are listed on the Contents Table by a Danger Rating alongside an Attribute. In the case of this screech, it was a DR10 WIL check.
Griffid failed the check, and was confused. The entry also says that on top of being confused, the Company is also ambushed by a man-sized bat creature. You generally do not check for surprise in Bright Crescent Company, and the Commander attacks first. In some cases, such as the Chiroptyrant result, the enemy can ambush the Company. In this case, the Attack roll is considered an automatic miss, and the battle begins by rolling the enemy’s damage dice.
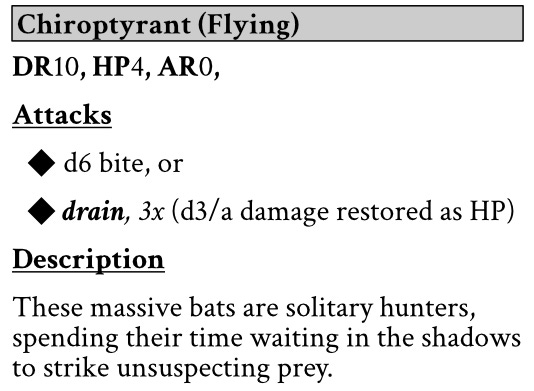
On top of being Ambushed, Griffid has also succumbed to confusion, one of several conditions in Bright Crescent Company. Conditions impose penalties that are not easy to get rid of. In the case of confusion, there is a 2-in-6 chance that the Commander will injure themselves instead of the enemy during combat. Basically, when confused, you must roll an extra d6 alongside the normal attack roll. If it turns up a 1 or 2, the Commander is damaged instead of the enemy. Fortunately, I rolled 4, 5, 5, and 6 on each of the four checks I had to make.
The Chiroptyrant, like most enemies in Bright Crescent Company, has a standard attack (d6 bite) and a special ability. The Chiroptyrant’s drain ability allows it to do d3/a damage and restore it back as HP. With its low HP (4), this isn’t too broken of an ability. Armor doesn’t decrease the amount of damage from abilities, so the Chiroptyrant managed to take 3 HP from Griffid and restore itself to full health.
“The stairs appeared surprisingly fast, and they weren’t even guarded. I don’t know what kind of security the Demon King has, but they need better leadership. Griff spotted an oddly shaped, and poorly hidden, lock box near the stairs. Where the demon filth discovered an enchanted rune I’ll never know. Afdan, the chirugeon, identified it immediately as a vitality rune. Will likely be useful the deeper we go into this hellhole.”
- Excerpt from Morfel the Hammer’s campaign log
Finding the stairs, as I did in the fourth chamber, does not mean you have to immediately descend to the next floor. If you have other avenues of progression, you may continue exploring. This is balanced by the fact that your resources (health, bandages, unit abilities, etc.) may become drained. Unit abilities, like the Chirugeon’s Heal Wounds (2x) and Restore (3x), don’t reset even with a rest.
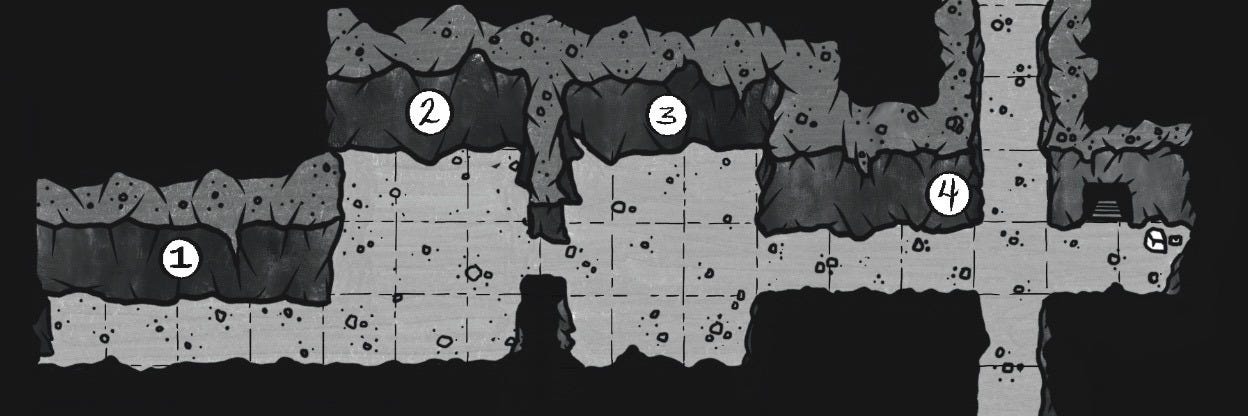
Even when the stairs are discovered, you must roll for chamber contents. In this case I rolled a treasure chest and got lucky that it was neither an Imitator (think Mimic) or trapped. A roll on the treasure table resulted in a Rune of Vitality. Magic in the Oathbound world, and by extension Bright Crescent Company, is limited to Runes. Runes do a specific function (like restore HP, cure a condition, or give resistance to certain enemy types) and have a limited number of uses. In the case of the Rune of Vitality, it heals d6/a+3 HP and has three charges.
All in all, the first level of the Burning Lands didn’t prove to be too deadly. Commander Griffid is sitting at 13 out of 16 HP, and has acquired a healing rune. Things only get more difficult from here, though. The lower we travel, the deadlier the enemies, traps, and environment will become.
This was a great read, I love the excerpts of lore and design breakdown, it feels very comprehensive without overwhelming me with information! Looking forward to seeing how this delve turns out for Griff and his team!